Sunday, June 30, 2013

#17 - Propagation - Blackberry Plants

Propagation -  Blackberry Plants


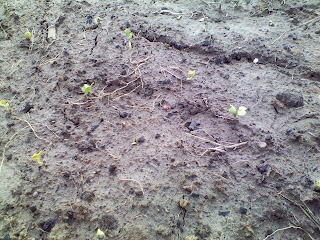
The photo above shows three cuttings taken from three different Blackberry plants. One (far right) was from a Apache Blackberry plant, and the other two (on the left) were taken from Arapaho Blackberry plants. All plants were planted in 15 gallon soft pots. The Cuttings were taken from the new cane shoots.


This one is the Apache...


Cutting taken from this plant, from the new shoot this year. I thought that I might as well take a cutting so that the plant will bush-out as recommended. I took a cutting that was about 12 inches long, stripped off most of the leaves, and stuck it in the pot about almost half-way.


One of the Arapaho...


The other Arapaho...


This is one of two of the Arapaho plants I took cuttings from. Again, the idea of cutting the top most part of the new cane so the plants will bush-out.

 I had success last year doing this, but some of the plants were damaged by squirrels hiding their pecans in the pots. For some reason, they like to bite the plants in half will digging. Sometimes new shoots will sprout up from the ground. It will happen if your plant had time to root. I will keep the soil moist and mist the plants also, and hopefully in time they will root and become another plant.


On a side note...I am spinning the new release from Steve Vai. His new album is called, The Story of Light. I have to confess that I'm a guitar nerd. I love a lot of the so-called guitar heroes. Check it out...


Steve never ceases to amaze me. He writes very unusual music, sometimes I think he is from another planet. Check out this video taken the Eric Clapton's - Crossroads Guitar Festival, which I had the pleasure of attending in 2004. I was there!!

Wednesday, June 19, 2013

#16 - Apache Blackberry Plant

Apache Blackberry Plant


We're eating from our Apache Blackberry - Rubus spp, this summer of 2013, the fruit is tart when just turning black, but very sweet when ripe. I bought eleven plants in the spring of 2012. Ten went to the "Farm" in Kemp, and I kept one here at home. The pics are of the plant at home. The plants at the "Farm" took some damage from grasshoppers, so they're not doing as well, but they are alive. The grasshoppers are not eating them yet, but I am sure they will before the year is over.


This is the first year the plant has produced fruit. The fruit is not as big as I've seen it get from other plants. Hopefully it will increase every year from now on.


It's really cool to me that we're eating from our very own plant! Don't you just hate people that discover things other people have been doing for years. But it really is great!


Audible...I'm currently listening to "NOS4A2", an audiobook written by Joe Hill, who I've come to find out, is the son of Stephen King. I've read Joe's other book, "Heart-Shaped Box", which was very good. I recommend them both if you're into horror.

Tuesday, March 19, 2013

#15 - Pink Lemonade Blueberry

Pink Lemonade Blueberry


I just bought this Pink Lemonade Blueberry - Vaccinium 'Pink Lemonade'. March 18, 2013. I will post more pics soon.
 

#14 - Fodder Radish

Fodder Radish


Fodder Radish - Raphanus sativus. Extremely valuable compost crop with very deep tap root that brings up nutrients from the subsoil and breaks up clay. Produces a great bulk of material. Traditional over-winter forage relished by animals like sheep. Edible big juicy roots. Planted December 16, 2012 on a Root Day.

Seed should be sown in mid-Summer and no later than early Fall. Allow crop to mature over Winter. The crop will gradually die down on the surface of the soil, ready to be incorporated into the ground, which will be ready for planting in the Spring. Matures in approximately 17 weeks. May also be harvested for compost. Sow about one packet per 50 square feet.


Picture taken on Janurary 5, 2013.

 
Picture taken on Febrary 16, 2013.


Pictures taken on March 9, 2013


Pictures taken on March 16, 2013..


Pictures taken on March 17, 2013. I enjoy the watching the bees going from flower to flower. I'm hoping to let this 4'x5' area go to seed so that I can save the seed for futre plantings. No pods are showing yet. Soon!


Monday, March 11, 2013

#13 - New Composting Bin

New Composting Bin


I built this simple Composting Bin on Saturday 9, 2013 at the "Farm". I used four "T-Posts and some wire. Anytime I clear a piece of land for creating a new planting bed, I put the material into the compost bin. It will eventually go back to where it came from, hopefully as organic matter.


On Sunday 10, 2013, I cleared an area to plant some Jerusalem Artichoke on a "Flower Day". That is alot of material in the compost bin. I have the carbon to add to the compost, which consists of dried hay and also dried leaves.


The picture above shows the area I cleared.


#12 - Horn Manure 500

Horn Manure 500


The idea behind Bio-Dynamic Gardening is to build up soil. Bio-Dynamic farmers consider themselves farmers of the soil. They do this by using special preparations, "Preps" for short. I sprayed the "Bio-Dynamic Prep" 500 on Sat. 9, 2013. I obtained the version that Alex Podolinski developed. Used to stimulate root growth and humus formation in soil.

The day was overcast and there was a 40% chance of rain. All it did was spit on me. It was fairly windy also. It is not recommended to spray when it is too windy. But I really wanted to do this.

I don't believe that I can make this on my farm yet. Hopefully in time I will be able to make this prep myself. But for now, I have to buy this prep to heal my soil, that was used for hay production before I started to farm. So there are some bad farming practices that have to be corrected.

I also hope to have cows on the farm one day. They are the magic that happens on a Bio-Dynamic farm. If managed properly, they will help heal your land.

I believe that Permaculture can save the world. And that to manage it properly, you should practice Bio-Dynamic Gardening.

If you want to know more...check out Peter Proctor


Tuesday, March 5, 2013

#11 - Propagation - Autumn Olive

Propagation of Autumn Olive


What the picture above shows is a Clam Shell Air Propagator, secured around a branch from an Autumn Olive shrub or small tree. In the Permaculture world, Autumn Olive fixes atmospheric nitrogen in its roots. For that reason, trees are planted near them to benefit from the nitrogen.


Propagation or cloning plants is an inexpensive way to increase your trees and bushes and other plants. The idea of the Air Propagator is that you cut the bark of the desired plant to be propagated, and affix the clam shell around the cut so that the stem will root. After the plant has rooted, you can remove the branch and plant it, thereby cloning your plant. That's what I'm attempting to accomplish here. We shall see if this is successful this year.

Also, the Autumn Olive produces fruit that is juicy and edible, and also makes a good dried fruit. Though the fruit are small, the tree bears them abundantly. They are tart-tasting, with chewable seeds. Their content of the antioxidant lycopene is some seven to seventeen times higher than that of tomatoes.


The picture above shows a successful cloning of a cutting I took from one of the Autumn Olives I bought. I did not use the Air Propagator for this cloning. I will try to get a better picture as I see this one is a little out of focus.


A better piture taken on March 19, 2013.


The subject of Money: Like my dentist once told me, "Only floss the teeth you want to keep". Then convert only those dollars you don't wish to see devalued...of course, being a Libertarian, I like to diversify in different silver coins with a cause, and here's one of them, minted in Texas. "Keep Calm and Slave On"


#10 - Planting Bed #4

Planting Bed #4


The development of another 5'x20' Bed. Planting Bed #4. Not much done on this day of Jan. 6, 2013. Just measured it out. I will try to up load the picture of what the ground looked like before I cleared it. Technical problems with my phone. This area of the farm is thick with grass. so it makes it hard to clear.


On Feb. 16, 2013, I took a straight blade hoe and traced the outline of the entire bed. Quite often when I work in the bed, I end up breaking the twine which is there to help me work within the bed.


For my good friend Wild Bill, the implication of this picture will mean something. I read an article about how important it is for us to stay connected to the earth. So on this day, I decided to Broadfork the entire bed barefoot, to soak up some much needed electrons and Vitamin D from the Sun.


The first run accomplished! That was all for this day.


It's hard work, so I look forward to rains, which makes this much easier.


Here is the finished bed on Feb. 17, 2013. There isn't a tractor that can duplicate this method of tilling. Besides, tilling with a tiller only reaches about 10", and it pacts the earth underneath, which does not help when the roots of the plants need to go deep down into the soil. With my broadfork, I can reach 12". And if I double dig the bed, then I'm reaching down 24". I've only double dug beds 1 & 2.


Gardening Techniques: here is David from Valley Oak Tool Company demonstrating the Broadfork I use. As you see David working with and standing on the Broadfork, I've fallen over many times. I looked at alot of Broadforks, and this was the one I thought was the best.


Monday, March 4, 2013

#9 - Planting Bed #3

Planting Bed #3


This is Planting Bed #3, prepared on November 2012.


Planted with Fodder Radish, December 16, 2012, a Root Day. Extremely valuable compost crop with very deep tap root that brings up nutrients from the subsoil and breaks up clay. Produces a great bulk of material. Traditional over-winter forage relished by animals like sheep. Edible big juicy roots. Planted 3" apart in a hexagonal pattern so that the leaves of the radishes will touch each other and create a Living Mulch. About a 4'x5' area.


I took this approach to help break up clay soil and make for a bed that will let me Double Dig easier.


Upon return to the farm, the radish had begun to come up! December 30, 2012


A close-up, very exciting! Although, if you can't grow radish, you might as well give up gardening. There's no hope for you.


Libertarians: A lesson from Murray Rothbard... The Government Is Not Us. You can find other videos and more education in liberating yourself here at the Ludwig von Mises Institute


Wednesday, February 27, 2013

#8 - 13 in 13 - Composting

13 in 13 Composting Update
 

The photo above is from my Compost pile started in 2012. I have started seeds and I'm using this compost for my seed starting mix.


I bought this sifter that fits over a 5 gallon bucket. I grab a couple handfulls of compost and then sift it. The material that does not fall thru, I dump into next years compost pile.


I use my hand to push as much of the material as will fit thru the sifter's grid.


I am also using the compost to ammend into my 5'x20' planting beds' soil. I'm hoping to get at least 10-5 gallon buckets full of compost for my needs.


Parting quote: While you love your modern life, you might have no idea how it is killing you because you can not see, feel, touch, smell, nor taste the poison………….. Dr. Jack Kruse


Wednesday, January 9, 2013

#7 - 13 in 13 - Gardening

Planting Bed #2
 
Planting Bed #2 is a mirror to Planting Bed #1. It was planted with the same over winter mix (field peas, oats and vetch) as Planting Bed #1. Planted October 2012.


The picture above is the over winter mix I bought from Johnny's Seeds.


The picture above is Planting Bed #1.


The picture above is Planting Bed #2 in December 9, 2012. You can see that the peas are flowering.


The picture above is after a cold front came through just before December 16, 2012. Hopefully the Vetch will come up in the spring.


On a side note...The new album from that little ol' band from Texas is good!